 |
| April Fool 2012 Adventure |
Below are few tips I have prepared myself and hope to guide amateur on this climb and things to prepare. Do note this is ideal only for non-snowing season.
About the Trail
- Before attempting this trail, you will need to prepare three paperwork arrangement, see my previous post on Snow Mountain from Wuling Farm.
- Preferable to spend a night at Wuling Farm Campsite or drive up all the way to the Trail Head Checkpoint and there are carparks where you can spent a night. There is a toilet for both Male and Female but no shower available. Car camping should be not a problem but I do not think you can pitch a tent at the carpark.... can try your luck.
- Check-in your paperwork at the Trail Head Checkpoint Office (do not forget your ID or Passport) and you will have to sit in for a 15mins video lesson. Once that is done and paperwork stamped, you can be on your way.
- From the trail head to Summit is 10.9Km but on my GPS is only 10.6Km and can be done in one day or two days if you are physically fit, not for average climbers. However you probably see nothing along the way.
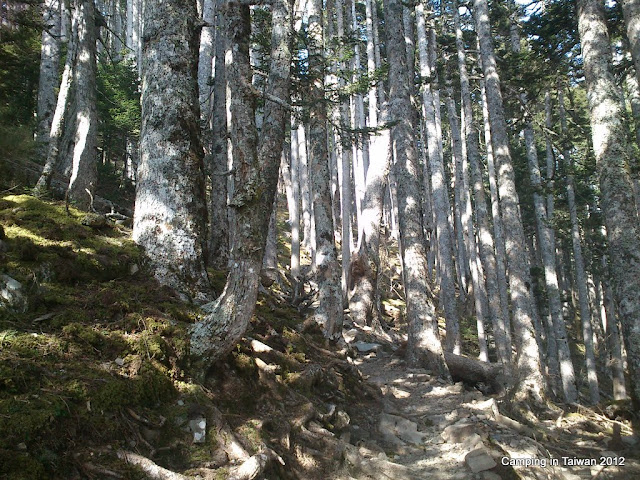
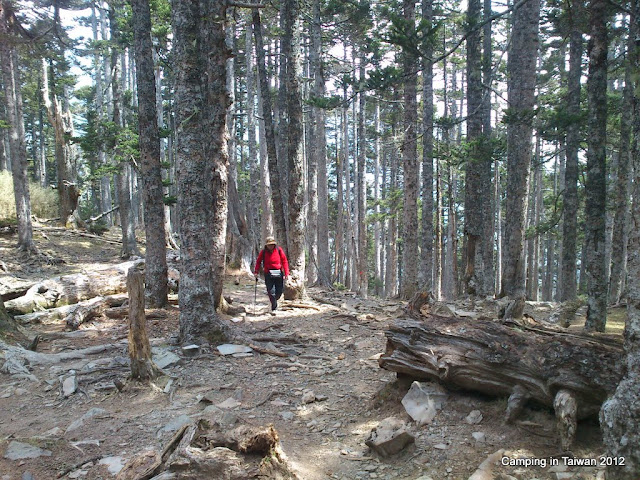
- Try to go slow, stroll if you can once you enter the Black Forest just after 369 Lodge. We had a close encounter with 2 Formosan Serows, a very shy and hard to observe animal. Enjoy the cool shaded forest. Personally this is our favourite part of the trail.
- While in Black Forest, take some time to sit down, sip your hot drink and listen to Mother Nature.
- Overall the trail is rather easy, the ascend is not so steep only at the last final stretch after Syue Shan Valley which can be very tricky. Do not attempt the last part with a full loaded backpack if you are not prepared. You can leave your backpack at Syue Shan Valley, for all I knew many left the packs and they pick up on the return trip.
Training and Hiking Timing
Personally you do not need any physical preparation because I was with my family members who were not prepared for this adventure. We were informed last minute and had only 3 days to prepare our gears. However the journey would take a longer time.
Below are the timing taken for amateur climbers. (Note Distance from GPS)
Below are the timing taken for amateur climbers. (Note Distance from GPS)
- 1st day: Trail head checkpoint > 369 Lodge 6.7Km 9hrs. (include lost 1hrs 30mins for lunch)
- 2nd day: 369 Lodge > Syue Shan Valley 2.8Km 3hrs > Summit 1.3Km 1hrs 30mins .
- 2nd day: Summit > 369 Lodge 4.2Km 2hrs 30mins
- 3rd day: 369 Lodge > Syue Shan East Face > Trail head Checkpoint 6.7Km 4hrs 40mins
Overall Hiking Timing and Distance
- 1st Day took total 9hrs 6.7Km
- 2nd Day took total 7hrs 8.4Km
- 3rd Day took around 5hrs 6.7Km
- Trail Head Checkpoint (0Km)
- Cika Lodge (2Km mostly steps)
- Crying Cliff (3.8Km mostly rocky)
- Syue Shan East Face (4.5Km mostly rocky)
- 369 Lodge (6.7Km flat ground)
- Black Forest (7.2Km rocky and flat ground)
- Syue Shan Valley (9.3Km)
- Summit (10.6Km last part extremely steep and rocky)
Download KML for Google Earth / Map or view Google Map
Trail Head Checkpoint (0Km)
Cika Lodge - Sleeping and Cooking Area (2Km)
 |
| Path from Trail head to Cika lodge |
 |
| Limited camp ground space |
 |
| Sleeping Arrangement |
 |
| Kitchen Cum Dinning |
Crying Cliff (3.8Km)
Syue Shan East Face (4.5Km)
369 Lodge (6.7Km)
 |
| Black Forest Background |
 |
| Sleeping arrangement |
 |
| Porter cleaning up after tourist departed. There are only 4 outdoor dinning table |
 |
| Sun rise from 369 Lodge |
Black Forest (7.2Km)
 |
| Formosan Serow |
Syue Shan Valley (9.8Km)
 |
| Over looking the last stretch of steep ascend |
 |
| Syue Shan Valley |
 |
| extremely steep rocky section |
Summit (10.6Km)
- Try not to cook lunch or boil water while hiking, these will eat up your hiking time
- Bring plenty of dried ration such as beef or pork jerky, raisins, peanuts, Snickers Bar, biscuits, dried mango etc. for trail food. Eat while you hike
- Bring along a Thermos Flask 600ml
- Headlamp with extra batteries
- Spare emergency lamp or headlamp with red lamp so not to irritate other climbers when they are sleeping
- Arabian Scarf (it work better than Buff)
- Survival Blanket
- Handphone for emergency call
- Ear plugs, you definitely need it if you are sleeping in the lodge
- Knife or Multi-tool
- Cookset and Stove
- Aspirin and Flu tablets (we had mild headache and some climbers came down with a flu)
- Whistle
- FAK (First Aid Kit)
- Small backpack for second day ascend to Summit (pack survival kit, Thermos flask, headlamp, FAK, dried ration, rain gear etc)
- Hiking Pole (remove Stopper and Basket)
- For amateur climbers - when ascending, try to go slow. The trick we used was take a slow step, half a second for next foot to place on the ground, if it is too steep, take 1 to 2 seconds. Found it was very effective, stop less, less strain on the legs and we saw more stuff around with our head up. Control breathing and take deep breath once in a while.
- Compression backpack packing with trash bag
- Cover your nose and mouth when sleeping from the dry cold air
- Bring relaxant or sleeping pills
- Bring sun lotion and lip gloss
- Use a Hat instead of a Cap
- Lock your shoelaces when going downhill (Read Here)
- Gas cannister 200gm should be sufficient for 1 person.
- The weather is always changing, be prepared for the worst
- Be prepared for the worst shit hole in your life if the lodge is full
- There are no lighting available at both Cika and 369 Lodges
- Water source is from the mountain pipe to the lodge water tank, best boil before consume
- Bring nice German or Chinese Tea
- Bring some sour plum, helps if you are giddy and also replenishes your salt
What did I carry
Total Weight of my pack was 11.6kg, base weight after water and ration 8kg
- 10 deg Sleeping Bag
- Thermarest Prolite Mattress
- Compressible Pillow
- 2 spare clothes + 1 socks
- Survival and First Aid Kit
- Head Lamp
- Spare Head Lamp (Petzl e+Lite)
- Spare Batteries
- 3Kg Ration 3 days split with partner
- Platypus Hydration 2L Bag
- Single Hiking Pole
- Gloves
- Spare Camelbak MULE for second day ascend to summit
- Monoculars
- Handphone and Spare Batteries
- Whistle
- Pure Easy Water Filter
- Cookset for 2
- Alpine Stove + 380gm cannister
- Mini Toiletries Kit
- 1 roll of Toilet Paper with inner core removed
- Disposable rain poncho
- Disposable Hotel Slippers (reusable if not damage)


My Outfitter
Cheap lightweight Hat
Shemagh (Arabian Scarf)
Giordano G-Warmer Under-shirt with Marmot Breathable T-Shirt
Cheap NT400 Fleece Jacket
REI Rain Gear
Columbia Convertible Hiking Pants
Giordano G-Warmer Underpants
Semi Wool Underpants
Wool Socks
Giordano G-Warmer Socks
Montrail GTX Hiking Boots
Mechanic Hand Gloves
Gear tested in the lowest 3 deg 3000m high environment
- The Giordano G-Warmer was excellent, highly breathable and stretchable.
- Used 2 layers of Underpants when cold but remove one as it get warmer
- The Shemagh works better than my partners Buff, was able to use in many configuration, covered my complete head from cold, kept my neck warm and kept the sun from my face.
- The Columbia Hiking Pants was rather thin but the stretchability prove excellent during hiking
- The Mechanic Gloves was very excellent during hike, breathable and stretchable but was not able to keep my hand warm during the night.
- The 10 deg Sleeping Bag provided enough warm for the night sleep but I would have to sleep with full layers of clothing including the REI rain jacket. I even got too warm in the night.
- The cheap Made in China Alpine Stove was able to use with the Piezo igniter at 3000m high
- Single Hiking Pole System was effective as my other hands was free to grab rocks and trees
- A 380gm Gas Cannister was used and balance weight return 270gm. Only used 110gm of gas for 2 person for 3 days
- Hiking Pole with stopper do not provide good grip on the ground and the basket tends to get trap in-between the rocks. Only use basket when on sandy or snowy terrain.
 |
| These is what I found along the trail. It became rubbish on the trail |
Please bring all your trash back!!!!


